What tool is best to loosen an enail coil?
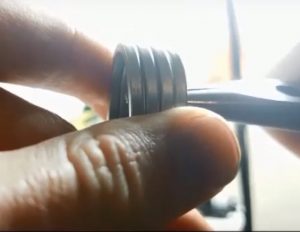
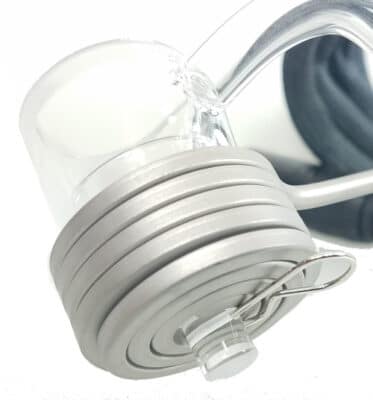
The right tool always makes for better and easier results. After some trials, I’ve found that a large pair of common household scissors is actually my favorite tool to loosen (or tighten) a heat coil. By wedging a closed pair of scissors in the middle of the coil, you can begin to slowly twist and adjust to get the perfect fit that you are looking for. A scissors is my favorite because of the comfortable grips. They also because they have flat, square outer-edges on the outsides of the blades; which provide excellent leverage. You can use a scissors or a variety of other hand tools which work almost as well, such as a needle-nose pliers. The important part is that your tool has a grip for twisting and also has an end that will grip the coil itself while you twist.
I also had good success with an auger/spade bit, which is a drill bit that cuts holes. That tool is not in this video, but if you look it up and you will see what I mean. It has a nice shape to help grip as you are bending.

How do I loosen my enail coil safely?
You may be wondering how much you can bend your e-nail coil before breaking any components or sensors inside your enail heating coil. The sensor is actually sandwiched in the middle of the coil. It runs throughout the length of the coil. Fast or extreme bending could crack and separate this component, leading to an EEEE error message on the screen and a malfunctioning sensor. Take it slow when bending to avoid shortening the lifespan of the coil.
Step 1 – Position the scissors and coil in your hand to get a firm grip: Take the scissors and push it through the top of the coil in through the bottom. Hold the coil with your fingers firmly and press on the walls to make sure it doesn’t bend crooked. Take care to get your hands in the right position so you can apply firm and even pressure.
Step 2 – Keep it straight and aligned. Be careful not to bend unevenly, or the coil could become crooked and slightly less efficient at transferring heat. If this happens just press firmly back the other way and use your hand to twist it tight. Follow the rest of the procedure — only in reverse.
To avoid crooked results: focus on keeping the top and bottom wraps from shifting horizontally when you start twisting. Use one hand to make sure the coil remains vertically aligned while twisting by put pressure on the top and opposite bottom sides that want to pop out. If you let these two areas bend out you might end up with a shifted coil that won’t fit the banger very well (or at all). These two opposite points tend to move out of wack as you twist the coil one way or the other, so just watch that as you go.
Step 3 – Bend slowly: After everything is positioned and snug, start bending very slowly, steadily, and firmly. Bend it a little further than you need it to go.
Step 4 – Hold it in place to create memory in the metal: When you get a little past where you think it might need to be tightened (guess) hold it there for 5-30 seconds. It’s a big range because 20 seconds seems like a long time, so you may opt for more cycles of shorter holds, or bigger bends.
Step 5 – Repeat and test: Do a few cycles of this and notice the small differences each time. It’s also better not to go too fast because it’s easy to get the coil crooked and un-even. If you do small increments it’s easy to correct any over-compensation.
Coil & Banger Fit Solved
Using this technique I shaved 1-2 mm from the diameter of my heat coil to make a much tighter fit for my banger. I left a little wiggle room to keep the quartz from being crunched as it heats up. It’s important to leave a little room; since quartz can expand faster than the coil and crack of the quartz.
Still confused? Here's a video for more detail:
Check out this quick and dirty video I made to show my easy at-home method to loosen or widen heating coils with just a scissors.

Find What You're Looking For?
Feel free to contact for further assistance.


